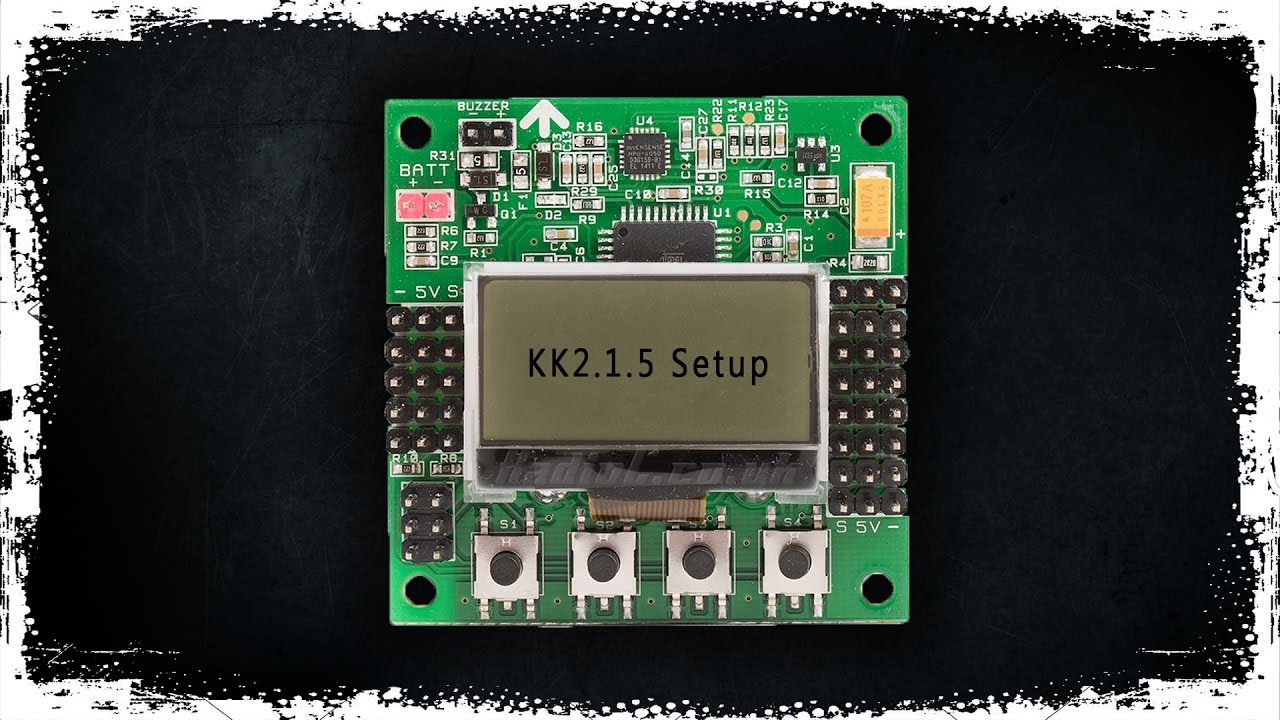
KK 2.1.5 Build Guide
Perfect first build for learning drone fundamentals with simple manual control. The KK 2.1.5 offers an easy-to-use LCD interface and teaches you the basics of flight stabilization without complex GPS features.
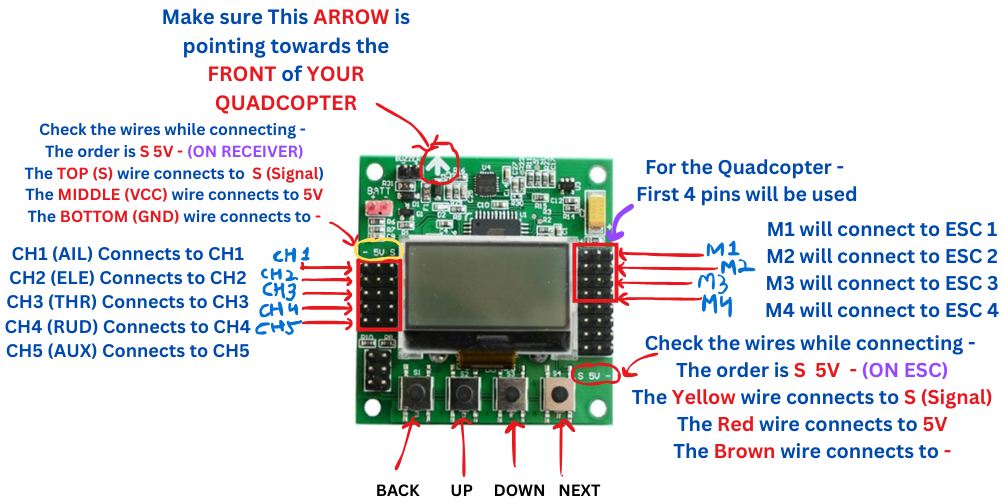
KK 2.1.5 Pinout
Understanding the connections and pin layout
Motor Outputs
- M1-M4: Connect ESC signal wires
- Pin Order: Signal, +5V, Ground
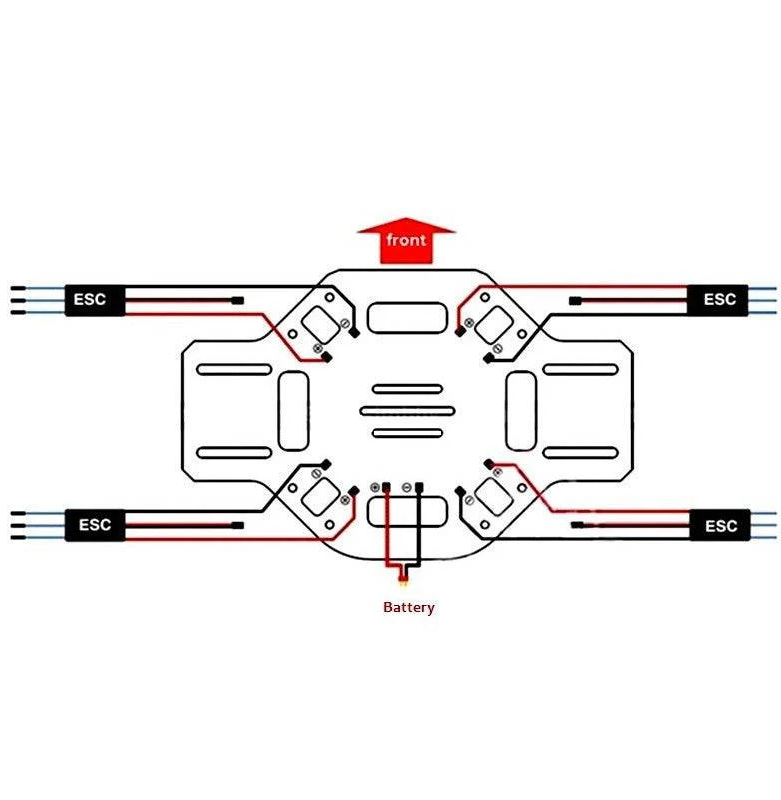
- Motor Layout: X-configuration
Receiver Input
- CH1-CH6: Receiver channels
- AILERON: Roll control
- ELEVATOR: Pitch control
- THROTTLE: Altitude control
- RUDDER: Yaw control
Power Input
- +5V: From ESC BEC
- GND: Ground connection
- Note: Do not connect LiPo directly
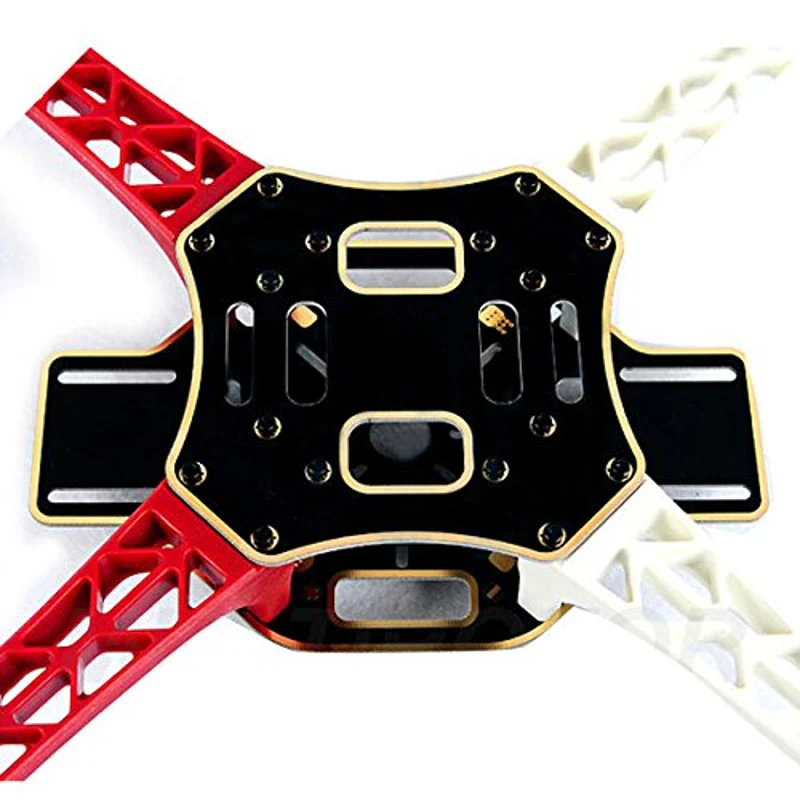
F450 Drone Frame Assembly
Building the structural foundation of your drone
Bottom Plate Setup
Install the ESCs and power distribution on the bottom plate. Solder the XT60 female connector for battery connection.

Arm Installation
Attach the four arms to the bottom plate using M3 screws. Ensure arms are firmly secured with colored indicators for front/rear.
Motor Mounting
Mount BLDC motors to each arm. Pay attention to motor rotation direction (2 CW, 2 CCW).
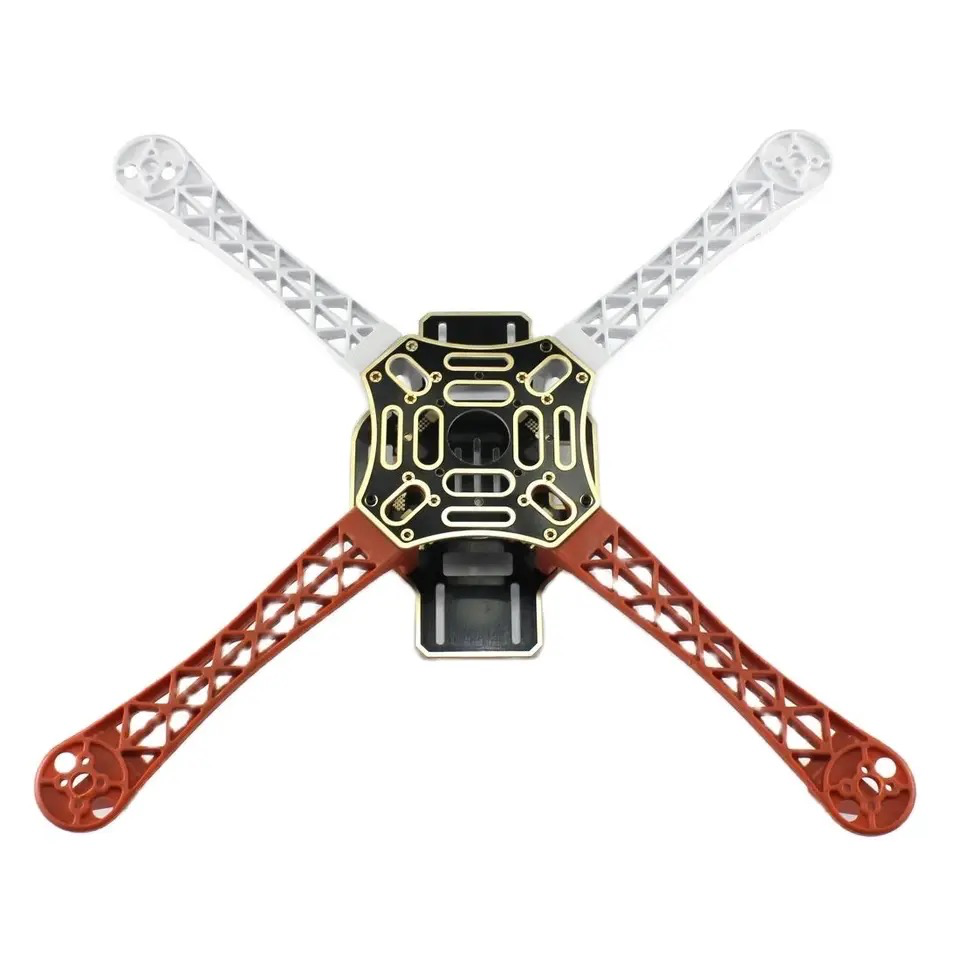
Top Plate Assembly
Install flight controller, receiver, and GPS (if using). Secure top plate with standoffs and screws.
Circuit Diagram & Connections
Wiring everything together correctly
Complete Wiring Diagram
Power Flow: Battery → PDB → ESCs → Motors & Flight Controller
Important: Always double-check polarity before connecting battery!
KK 2.1.5 Flight Controller
- Center of the drone
- Connect to all 4 ESCs
- Receiver input channels
- Powered via ESC BEC
FlySky i6 Receiver
- Channels 1-4 to FC
- Channel 5-6 for AUX (optional)
- Powered from FC
- Bind with transmitter
30A ESC (x4)
- Signal wire to FC motor output
- Power from battery via PDB
- 3 wires to each motor
- BEC powers FC and receiver
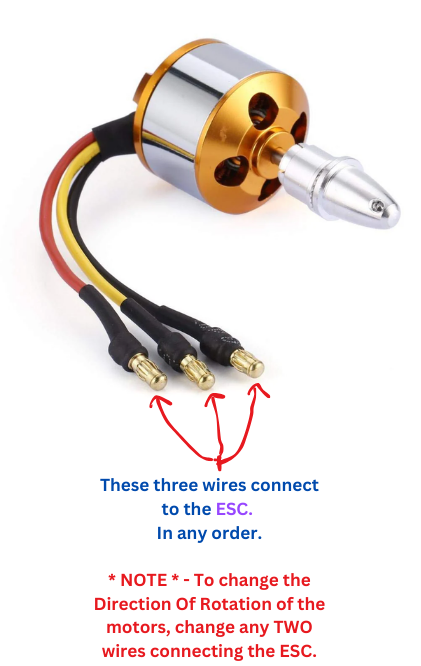
A2212 BLDC Motor (x4)
- 3 wires from ESC
- Swap any 2 wires to reverse
- Check rotation direction
- Install correct propellers
Detailed Connection Guide
Power Distribution Board (PDB) Connections:
- Γ£ô Solder XT60 female connector to PDB (+) and (-) pads
- Γ£ô Connect 4x ESC red wires to PDB positive pads
- Γ£ô Connect 4x ESC black wires to PDB negative pads
- Γ£ô Ensure all solder joints are clean and secure
ESC to Flight Controller Connections:
- ✓ ESC 1 signal wire → KK2.1.5 M1 (Front Right)
- ✓ ESC 2 signal wire → KK2.1.5 M2 (Rear Right)
- ✓ ESC 3 signal wire → KK2.1.5 M3 (Rear Left)
- ✓ ESC 4 signal wire → KK2.1.5 M4 (Front Left)
- Γ£ô Only ONE ESC BEC powers the FC (remove BEC from other 3 ESCs)
Receiver to Flight Controller Connections:
- ✓ RX Channel 1 (Aileron) → KK2.1.5 CH1
- ✓ RX Channel 2 (Elevator) → KK2.1.5 CH2
- ✓ RX Channel 3 (Throttle) → KK2.1.5 CH3
- ✓ RX Channel 4 (Rudder) → KK2.1.5 CH4
- Γ£ô Receiver is powered from FC via signal pins
Motor Rotation Configuration:
X-Configuration: Front-Right & Rear-Left spin CW | Front-Left & Rear-Right spin CCW
To reverse motor direction, swap any two of the three motor wires
KK 2.1.5 Setup & Calibration
Configuring your flight controller for stable flight
- Power on the drone with battery connected
- Use 4 buttons to navigate to "Factory Reset"
- Confirm reset by selecting "Yes"
- Verify firmware and hardware versions displayed
- Check that Gyroscope and Accelerometer show "OK"
- Navigate to mixer settings
- Select "Quadcopter X Mode"
- Confirm selection with "Yes"
- Motor layout screen will display
- Note motor numbers and rotation directions

KK2.1.5 LCD: Quadcopter X mode selection (reference)
- Place drone on flat, level surface
- Navigate to "ACC Calibration"
- Press "Continue" to start calibration
- Do not move drone during process
- Wait for "Calibrated OK" confirmation
Critical: Drone must be completely level and stationary during calibration
- Turn on transmitter
- Navigate to "Receiver Test"
- Use trim sliders to zero all values (except AUX)
- Move sticks to verify correct channel mapping
- Ensure all values return to zero at center
Configure PID values for stable flight:
Aileron (Roll)
- P Gain: 75
- P Limit: 50
- I Gain: 40
- I Limit: 20
Elevator (Pitch)
- P Gain: 75
- P Limit: 50
- I Gain: 40
- I Limit: 20
Rudder (Yaw)
- P Gain: 75
- P Limit: 20
- I Gain: 30
- I Limit: 10
Assembly Videos
Watch KK 2.1.5 drone assembly walkthroughs

KK 2.1.5 Assembly Tutorial
Watch Tutorial
KK 2.1.5 Build Guide
Watch Tutorial
Complete Assembly Walkthrough
Watch Tutorial